Glare TKL Assembly Guide
Basic Configuration Products
Top Housing
Bottom Housing
Weight
Aluminium Plate
Non-slip Feet
Carbon PU EVA Foam Exclusive Carrying Bag
Extra screw
Make sure to check before assembling
Look at the guide via installation method on the page below and check if the substrate is recognized properly after installing it.
Please PCB makes sure to check if there is any problem with the key input. (No replacement or refund after soldering)
Please check if there are any missing items in the basic configuration.
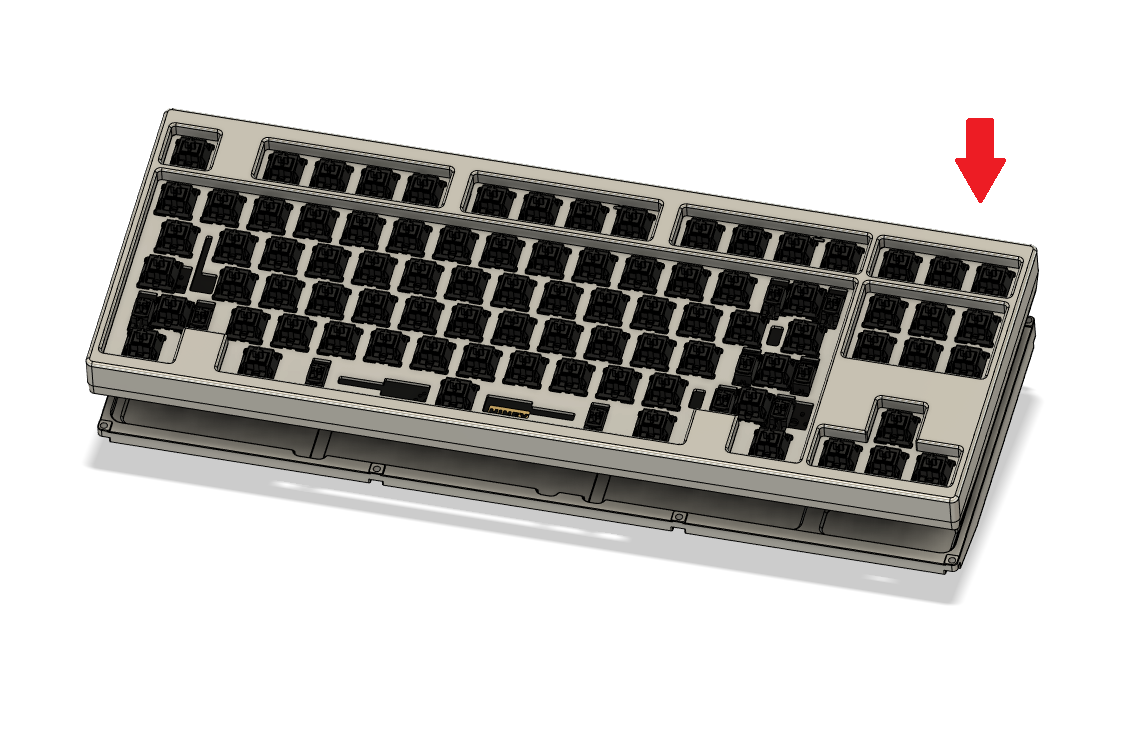
It is necessary to loosen the screws on the keyboard for assembly.
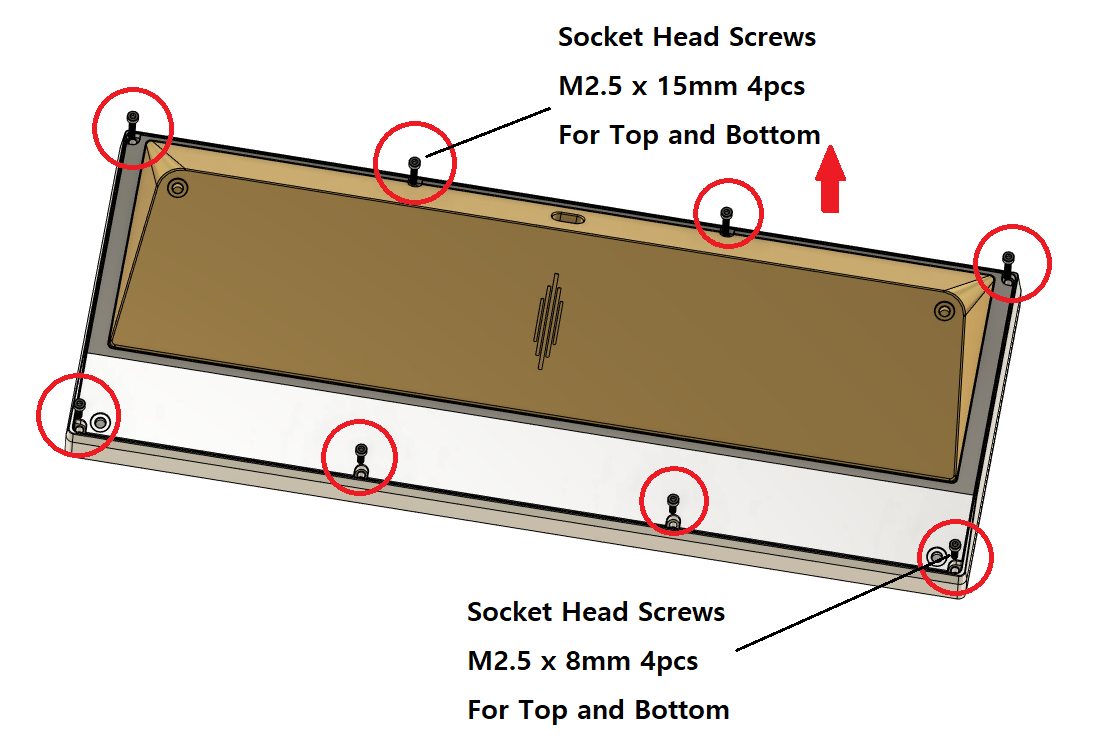
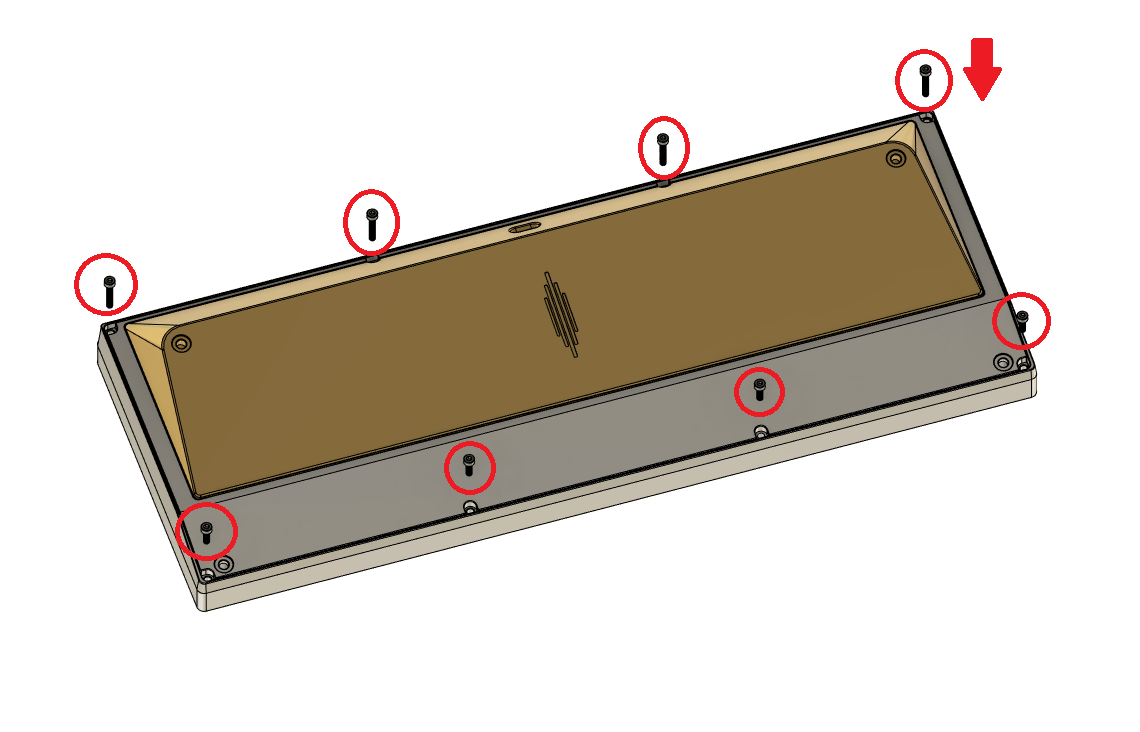
Remove the screw that connects the top and bottom.
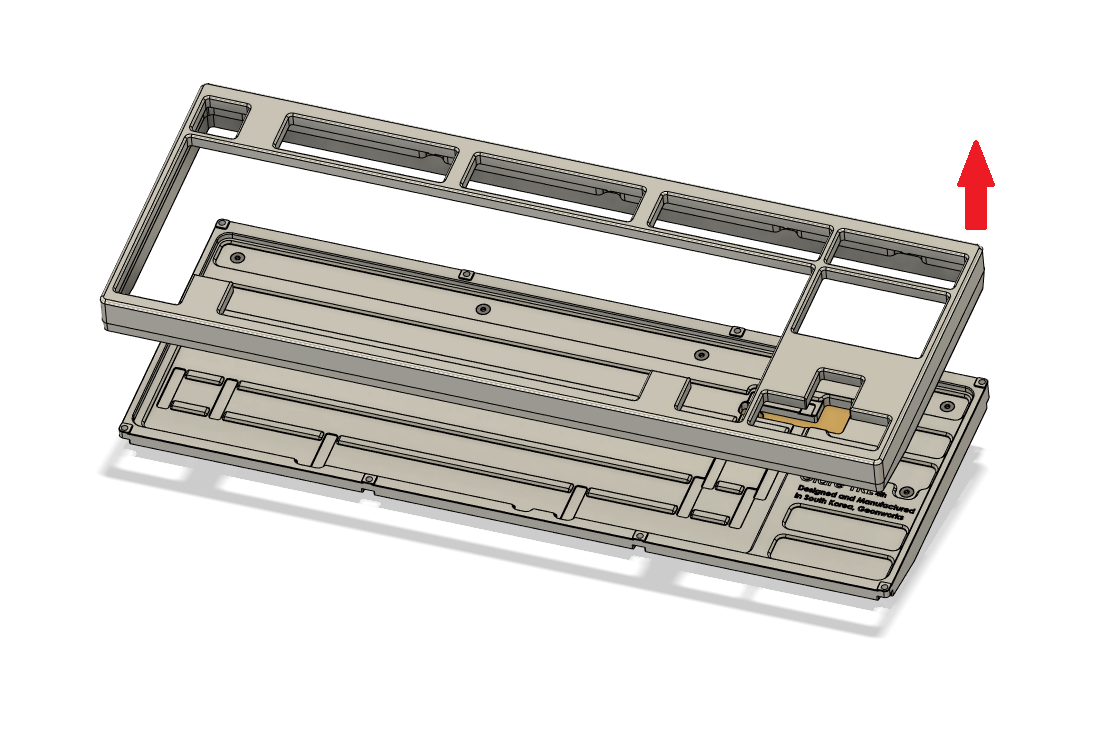
Lift and remove the top housing.
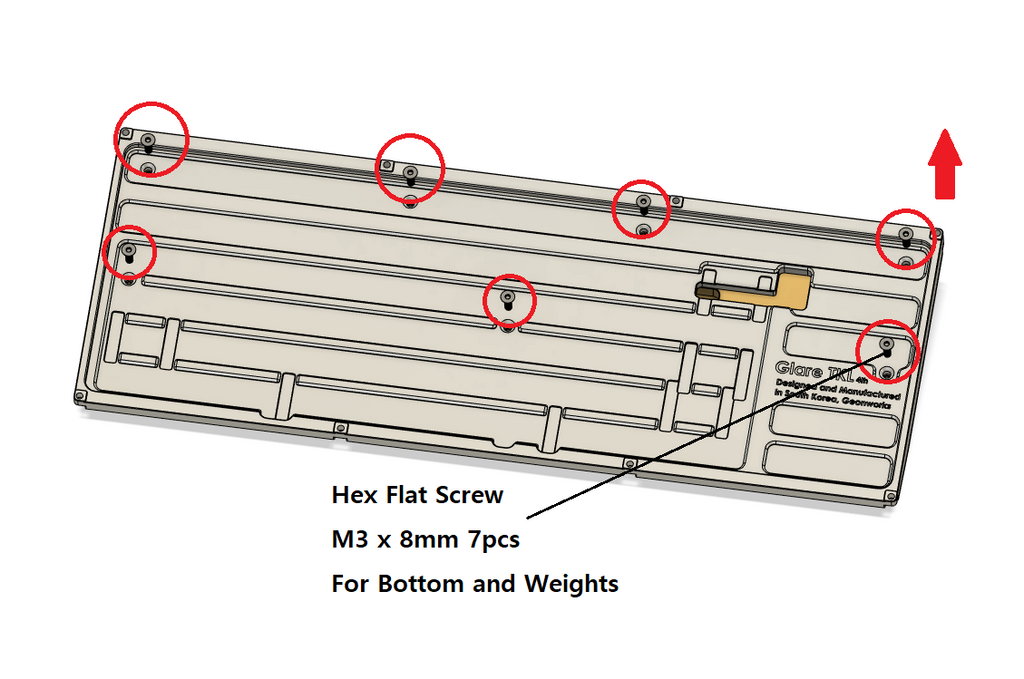
Remove the screw that connects the bottom and the weight.

Use a screw to fix the daughterboard to the weight.

Push in the connection cable.

Insert the bottom housing over the weight and tighten the screw.

Be careful not to get the cable stuck between you.

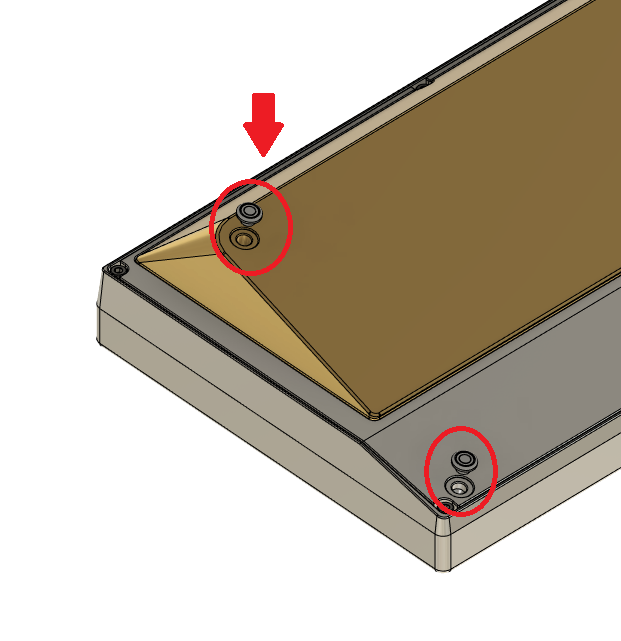
The enclosed gasket is for use in the lower housing.

Attach the gasket to the marked position.
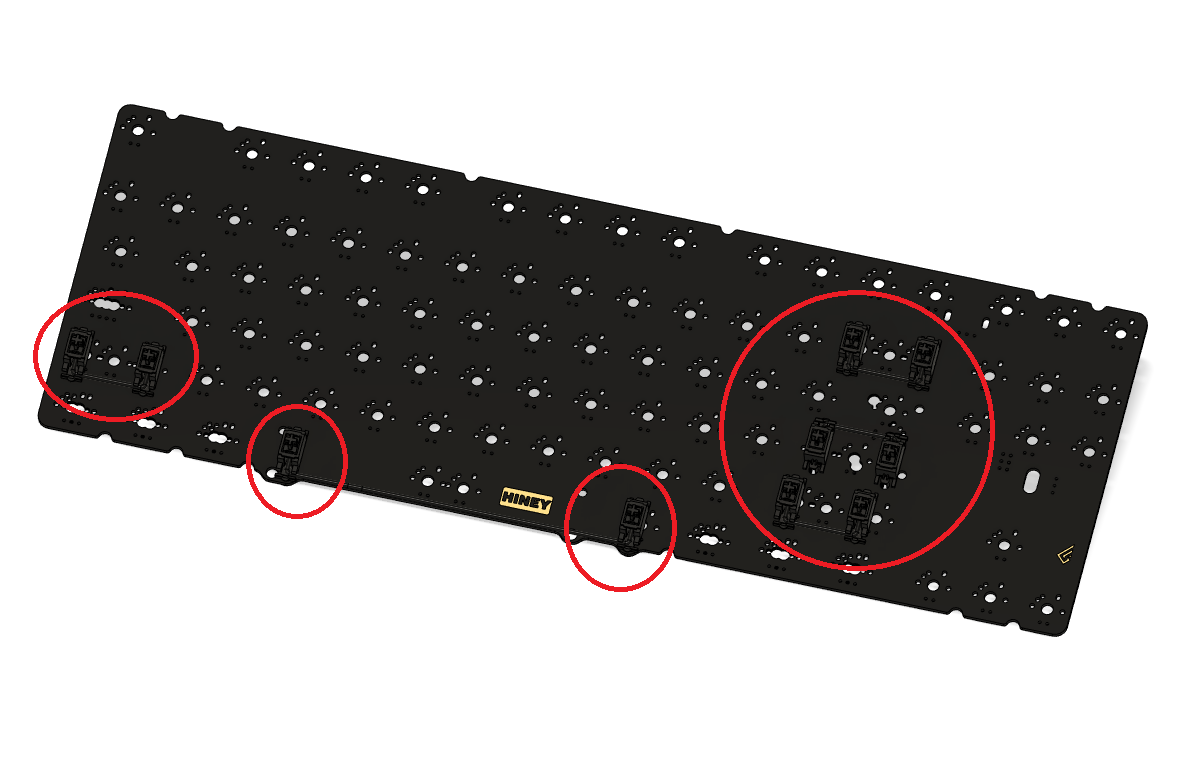
Test the substrate and install a stabilizer if there is no problem.
You can install it according to the arrangement you want to use.
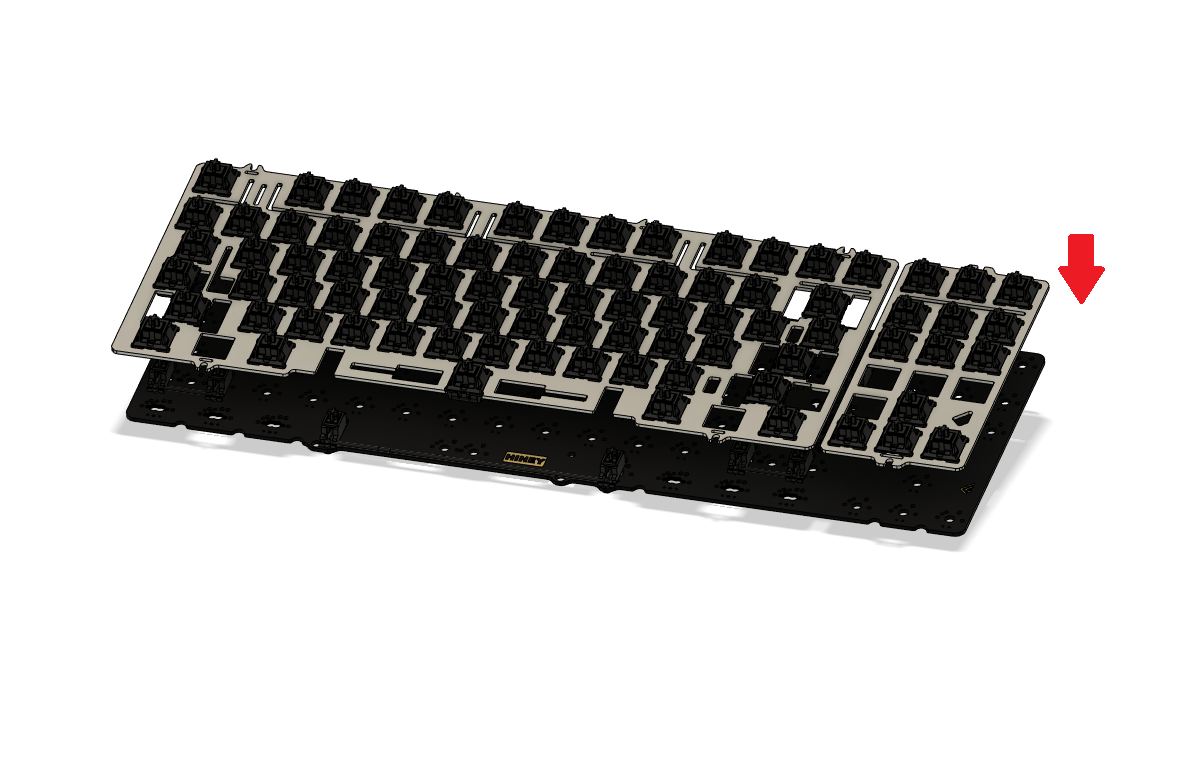
Prepare a plate, combine the switch, and solder it by combining it with the substrate.
Once the soldering is finished, check again whether there is any problem with the key input and correct the problem.
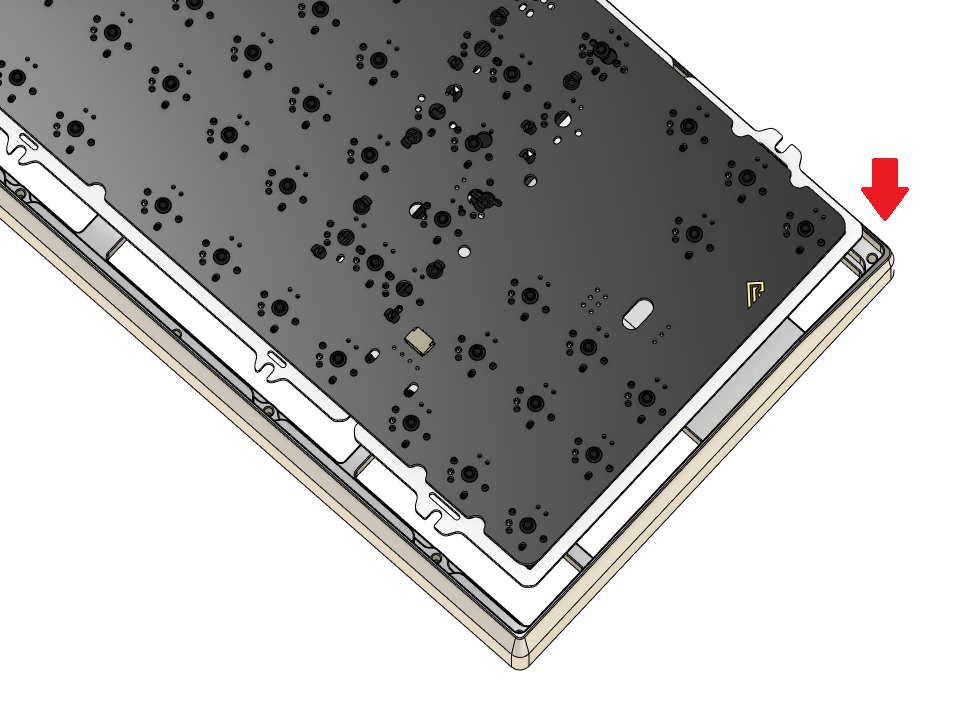
Insert the switch-plate-PCB assembly into the top housing
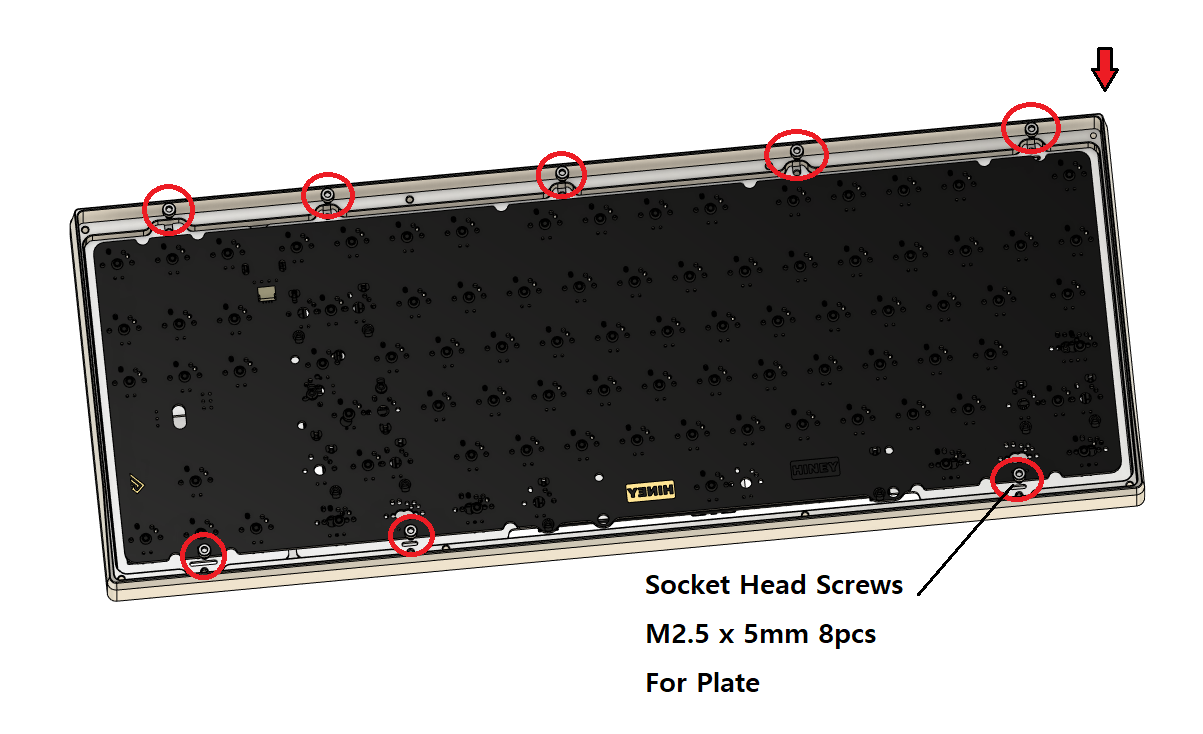
Use a screw to fix the switch-plate-PCB assembly
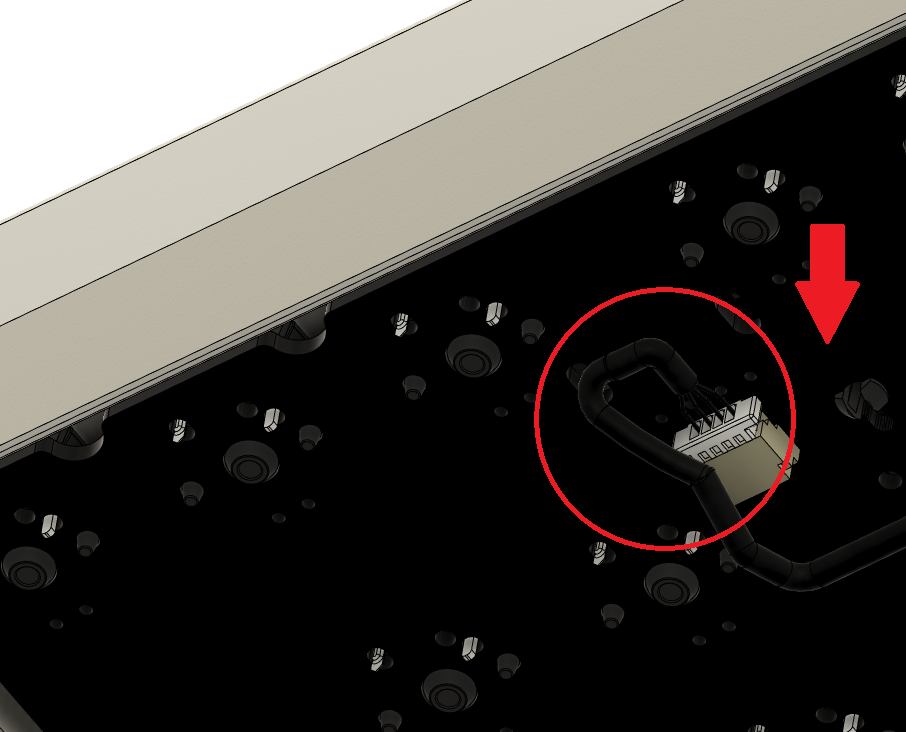
Connect the connection cable before connecting the top housing to the bottom housing.
If you lift the top housing too high, the cable may come off or the connector may be damaged.
Tighten the top housing and bottom housing with a screw.
Insert a bottom
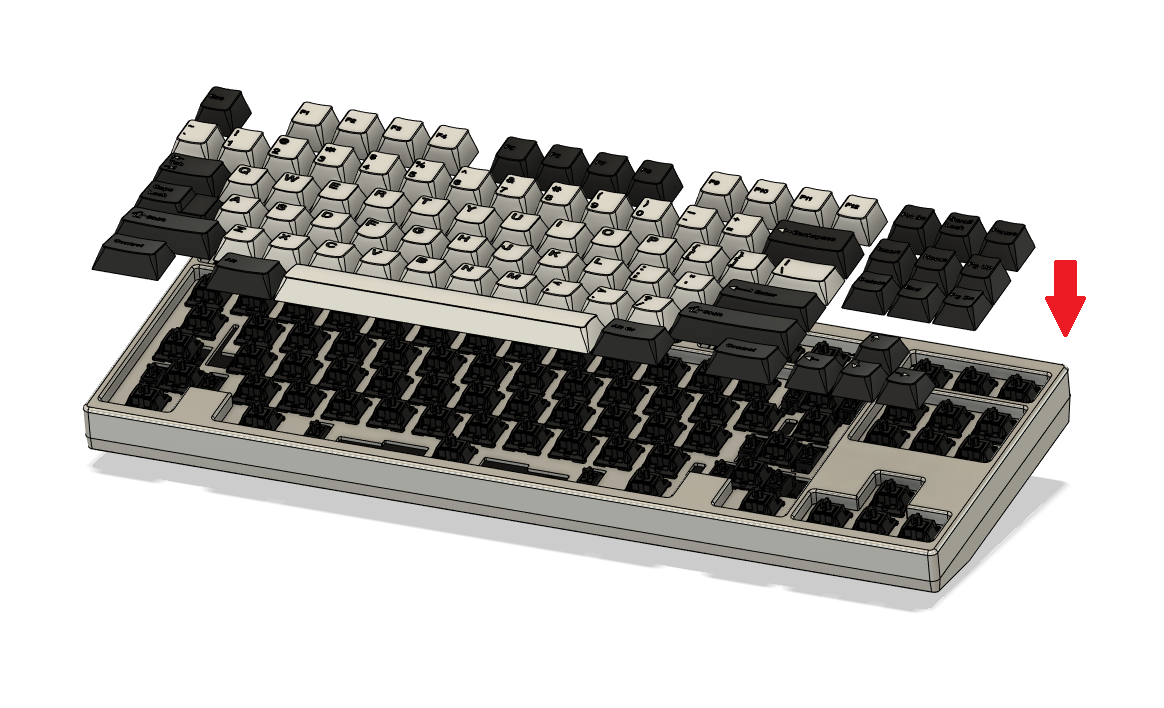
Insert the keycap you want to use.
The assembly has been completed.